
 Find us today.
 Click & Collect
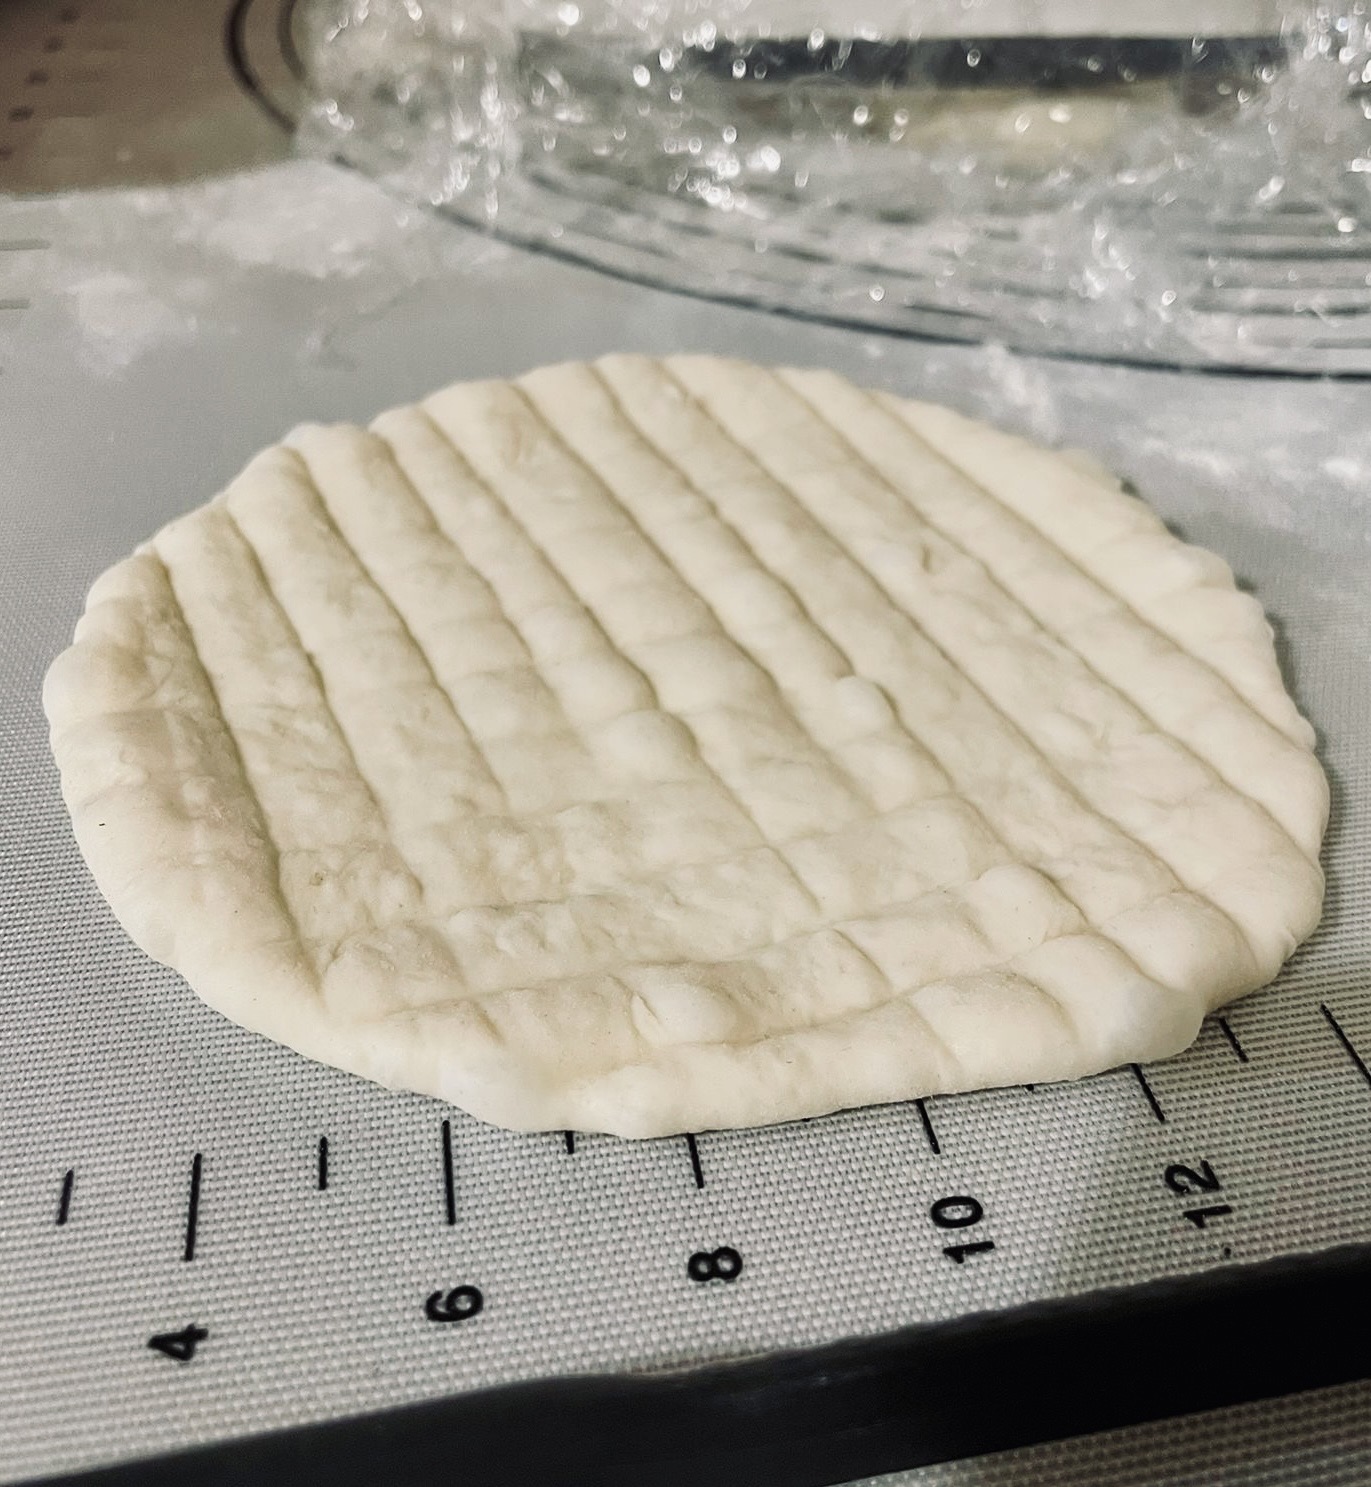
Greek Pita Bread — Manitoba 00, Tangzhong, Cartouche Method
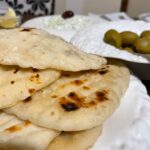
Greek Pita Bread — Manitoba 00, Tangzhong, Cartouche Method
Story
Chasing the wrap texture I wanted: soft, foldable, calm on heat. The cartouche steam keeps them pale and pliable; the same dough bakes into tender buns when the plan changes.
Description
Built for wraps, not air-balloons: a small tangzhong keeps them plush, oil goes in late so the gluten stays strong, and the cartouche-plus-steam gives a pale, flexible crumb. Hand-shaped only, with faint lines to keep bubbles polite. Same dough turns into soft sandwich buns when you feel like baking instead of pan-cooking. 😌
Steps
Cook the tangzhong
- 1Whisk 35 g flour with 175 g water over medium heat to a thick paste (~65 °C).
- 2Spread on a plate to cool to room temperature.
Initial mix (no oil yet)
- 3In the mixer bowl add 665 g flour, 315 g water, cooled tangzhong, sugar, yeast, and salt.
- 4Mix on low 3–4 min, then medium 3–4 min until smooth and elastic.
Add the oil (and optional lecithin)
- 5Whisk lecithin into the sunflower oil (if using). Drizzle into the dough slowly while mixing on medium
- 6until fully absorbed and the dough is shiny with a light window-pane.
First rise
- 7Cover and proof 40–60 min until ~1.5×.
Divide, ball, rest
- 8For pitas: divide into 16 × ~80 g. For buns: divide into 10 × ~125 g.
- 9Ball tightly. Rest 15–20 min, covered.
Hand-shape pitas (no rolling pin, lightly floured)
- 10Lightly flour the work surface and each dough ball.
- 11Press from the center outward with your fingertips, rotating as you go, stretching to 16–18 cm rounds
- 12about 4–5 mm thick. If it springs back, rest 5 min and finish. Brush off excess flour.
Pattern the dough (bubble control)
- 13Using the back of a knife, a chopstick, or a dowel, press light, shallow lines across the surface (1–2 cm apart).
- 14Optional light crosshatch. This helps disperse steam so you get soft, bendy pitas without a big pocket.
Cartouche pan cook (high heat + steam)
- 15Preheat a heavy-bottom pan on high until very hot.
- 16Add a few drops of water to the pan, lay a round of parchment (cartouche) on top,
- 17and wipe a single drop of oil over the parchment surface.
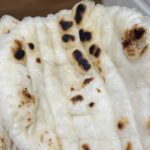
- 18Lay one pita on the oiled parchment. Cook about 45–60 s until bubbles form and begin to grow.
- 19Flip once and cook another 45–60 s until set and lightly blistered.
- 20Stack cooked pitas in a clean towel to stay soft. Re-wet under the parchment as needed to keep gentle steam.
If making buns
Shape buns
- 21After the rest, shape each ~125 g piece into a tight ball. Place on lined trays with good spacing.
Proof
- 22Cover lightly and proof 45–60 min until puffy; a fingertip dent should spring back slowly.
Bake
- 23Brush with water or a thin film of oil (sesame optional). Bake at 185–190 °C fan for 12–15 min
- 24until pale-gold with soft crust. Cool on racks. (Brush with a little melted butter if you want extra softness.)
Credits
Developed by me—chasing the artisanal flavor from my father’s place with the supple, consistent texture of a good factory pita. 🫓